Expert Guide To Bathroom Planning
Written By: Andrew Lee - Managing Director @ AJKB for over 20 years | Written: September 2026
In this article, I want to share my experiences and thoughts on bathroom layout ideas, planning a bespoke luxury bathroom, and how to design a bathroom that actually works. If you are considering renovating your bathroom, I hope this will give you the knowledge to move forward with confidence.
Designing a new room is always exciting, and I want you to stay excited about the process. However, I am going to have to cover the realities of how to design a bathroom layout, and not all of the information here is unicorns and rainbows. I do, however, believe it is all relevant to understand the journey you are about to take.
Over the last twenty years, I've seen a lot of different levels of installation quality. Unfortunately, in bathrooms, because the behind-the-scenes work is generally disguised by the fitting of the sanitaryware and tiles, I've seen way too many instances where not enough attention was paid to these hidden elements. I have seen a lot of property damage caused by leaks that could have been avoided. My hope is that after reading this, you will be armed with some useful knowledge to help you navigate the potential pitfalls of bathroom planning and installation, so you end up with the bathroom sanctuary you require and not your very own DIY SOS situation.
My best piece of advice is this: put all the hard work, sweat, and tears into the design phase. If you do this, you will avoid firefighting during the installation. The last thing you want is to replan your design halfway through the installation, or worse, have the headache of removing or exchanging items. At best, you will end up with a loose hybrid of your original vision, and at worst, a bathroom that is not fit for purpose. If the design and planning are right, the installation will be mostly plain sailing.
Start With the Room: Designing the Layout
As much as I would normally be advising to design around your own individual needs here, bathroom layouts are highly dictated by the room's physical constraints. In my experience, it's rare that a bathroom space is being built from scratch, so you are normally working with fixed architectural points. Before you look at bathroom design plans or finalise your bathroom layout design, you need to understand what your room will and won't allow.
The Soil Stack
This is arguably the most important design element. At 100mm in diameter, the main waste pipe cannot be easily tucked away into the floor or a wall. This soil pipe plays a significant role in where your toilet goes. Whether the soil stack is positioned on an outside wall or situated internally in the house, you have to work with it. You need to be able to maintain a gravitational fall from the point of the toilet to the point where you connect to the soil stack that then leads to the main drains. The soil pipe could run across a wall if required, but if this results in you running the soil pipe along the same wall as the shower, then this would require pipe boxing or the wall being packed out by a minimum of 120mm, losing this space from the room. You could be shrinking the room too much or adding a real headache to the installation that could potentially be avoided by just doing a slightly different layout.
Waste Pipes (Sink, Bath, Shower)
As with the soil pipe, these also need gravity to work. They must maintain a fall to reach the soil stack without colliding with other elements. These pipes are generally either 40mm or 32mm in diameter, so these are a lot easier to hide than the soil stack. However, they still do need to maintain that fall, and that in itself could be a factor that dictates the best run for these pipes.
Windows and Doors
In a pre-existing bathroom space, it is normally a bit more involved than a kitchen to move the window or door without causing a headache to either the exterior look of the property (in terms of the window) or having to change a hallway around for the door. If these can be moved, that could open up some more design possibilities. If not, the doorway and the position of the window will likely dictate your bathroom layout.
Domestic Plumbing
The hot and cold feeds (15mm pressurised pipes) are the least of your worries. Because they are under pressure, they can go in any direction and therefore easily be rerouted in walls or floors. Do not dictate your layout based on where the water feeds currently enter the room.
Hiding Pipes
While it is common to see pipes left visible on walls, I firmly believe all pipework should be hidden. Visible pipes catch dust, ruin tile lines, and spoil the finish. Clever hidden pipe runs, or maybe a false wall to hide pipes in, are always worth considering during the design process.
The Reality of Bathroom Products
In my early days in business, trading as Woodworking Solutions, I loved a challenge and tackled any interesting carpentry project, which included crafting bespoke bathroom furniture and completing full bathroom installations. However, after a few bathroom renovations, I decided to press pause on my bathroom involvement.
This was not due to a lack of requests; it was a matter of standards. The bathroom ceramics, brassware, and enclosures I had access to at the time simply were not up to scratch. For the first time in my self-employed career, I was having to return to projects a year later due to failing products: chrome peeling off shower frameworks, or the bottoms of ceramic sinks starting to craze. I had never experienced these issues with kitchens or bedrooms. It was a shock, especially since these weren't particularly cheap products. I simply wasn't going to continue installing items that would cause clients issues down the line, even though it had absolutely nothing to do with my installation.
This set me and my wife off on a very long journey to find bathroom equipment that could stand the test of time. The bathroom market is incredibly varied today, and understanding how it works is vital before you start planning a bathroom layout.
The Industry Landscape
Bathrooms on the High Street & Online
Of the three main fitted rooms we renovate—Kitchens, Bedrooms, and Bathrooms—the bathroom has become the most standardised on the high street. For ease, the industry has made choosing a new bathroom feel like filling out a weekly shopping list. You pick a toilet, choose a basin unit, select a shower enclosure, grab some tiles, and get someone to fit them all into your bathroom.
Because of this standardisation, bathrooms lend themselves heavily to online purchases. You can easily buy a sink, a toilet, a shower tray, and an enclosure from a mass supplier, get them delivered, and hire a plumber to fit them. Online companies usually deal with the shorter lifespan side of bathroom products, meaning materials and manufacturing costs are kept low. Combine this with the fact they only need a warehouse, saving money on staff and avoiding high street showrooms, and the result is that off-the-shelf bathroom products have dropped right down in price to basic manufacturing and shipping costs. While this is great for builders and quick developer flips, it has created a massive price gap between entry-level and high-end bathrooms, meaning much of the modern market is treated as semi-disposable.
The Standardisation Trap (The "Tetris" Problem)
Standardisation allows for mass production, meaning stocking for quick availability. However, standard sizes have another advantage: it means quicker, easier sales for mainstream companies. If sizing is the same or similar, it is much easier for salespeople to quickly swap one unit out for another without having to make any alterations to the design. Mainstream companies generally shy away from special sizes or complicated ranges because longer lead times and potential order complications or mistakes could slow down their turnover.
The danger here for you is that you might end up being quoted a bespoke-level budget for a standard-sized layout using higher-end products that don't actually fit your space perfectly. Your bathroom could end up suffering from a "Tetris" problem: trying to force standard blocks into a unique footprint. Many people don't even realise that bespoke sizing (like custom-cut basins, shower trays, and glass) is a highly realistic option.
Budgets vs. Installation Costs
If you are completely renovating a bathroom, you are likely re-tiling the whole room. Taking a room back to the bare walls and refitting the room from scratch is the right approach for longevity—especially for upstairs bathrooms, where leaks could affect downstairs rooms—but it is also a time-consuming job. At this point, the budget has usually become heavily skewed toward the labour. A proper bathroom refit is an involved process. Unless you're fitting it yourself, you're likely looking at a substantial labour investment.
If you are spending heavily on labour, it is worth asking what quality of bathroom products is right to complement the installation spend. If you use cheaper products with a short lifespan that will fail in three or four years, you are going to have to pay that massive installation cost all over again.
I would never suggest stretching beyond what you can comfortably afford, but if waiting another year allows you to do the project right with products that last, it is generally the smarter investment.
The Minefield of Colours and Trims
Bathrooms involve a vast number of separate manufacturers, and, so that they can stand out in a huge marketplace, they purposely do not standardise their finishes. This is true and most noticeable on metal colours and finishes, but it can also be true for white as well; it's amazing how many shades of white exist.
In metal finishes, you may find black and chrome to be the easiest to try and pair. But if you want a brass finish, you are suddenly dealing with a rainbow of different brass shades across multiple suppliers. Think about all the individual metal-coloured elements in a bathroom:
- Brassware (taps, showerheads, valves)
- Shower hinges and glass door trims
- Cabinet / shower door handles
- Bath overflow fillers
- Tile trims and shower surround trims
- General accessories (towel rails, toilet roll holders)
If you're lying in the bath looking at a couple of noticeably different finishes of metal colours, is this something that's going to stress you and stop you from having that relaxing bath you were just looking forward to? If detail is important to you, then matching these details is vital. You need to consider the colours and finishes from each manufacturer you plan to use in your space.
Bathroom Layout Ideas by Room Size
Someone looking up bathroom layout ideas almost always has a specific room in mind, so let's look at strategies based on your footprint.
Cloakroom / Small WC
In a cloakroom, you are usually working around the door and the window. From a privacy perspective, if the space allows, it is always best to place the toilet so you aren't opening the door directly onto it. Opening the door so you're facing a nice basin and mirror gives a much better feel to the space. Combine your toilet with a slimline or corner basin, and you have a basic cloakroom setting. As far as making that space unique to you, this is largely down to wall coverings, mirrors, and lighting. As this applies to all room shapes, we will cover it in more detail later.
When it comes to toilets, there are a few options:
- Close-Coupled: This is the standard toilet where the cistern sits directly on the back of the bowl. This is the most common form of toilet that you will have seen and probably grown up with. The bowl has a little extra piece on the back like a shelf, and then there's normally a big white ceramic section sat on top of that, with the flush button on top. These are available open (where you can see the soil pipe at the bottom going straight out of the wall underneath) or closed (where the porcelain covers the pipe continuing along the floor to the wall, and the part that connects to the soil stack is actually hidden within the toilet). You still see the cistern above, but they do look a bit neater as the soil pipe is hidden.
- Traditional High-Level: This is the classic cottage style where the cistern—the part that has all the water in it—is at a high level up the wall, with a chain hanging down, usually with a little bit of ceramic or wood on the end of it. There's a pipe that leads between that high-level cistern and the toilet. These are very original-looking toilets dating back to the late 19th century, and you will see these quite typically in farmhouses or traditional cottages. They are still manufactured, usually feature a lot of ornate detail on the ceramics, and are designed to look very traditional.
- Combination Units: For very tight spaces, this is effectively a close-coupled toilet where a small hand-washing sink is integrated directly into the top of the toilet cistern to save space. If you don't have room to add a sink in with your toilet in a very small cloakroom, then these are a perfect solution.
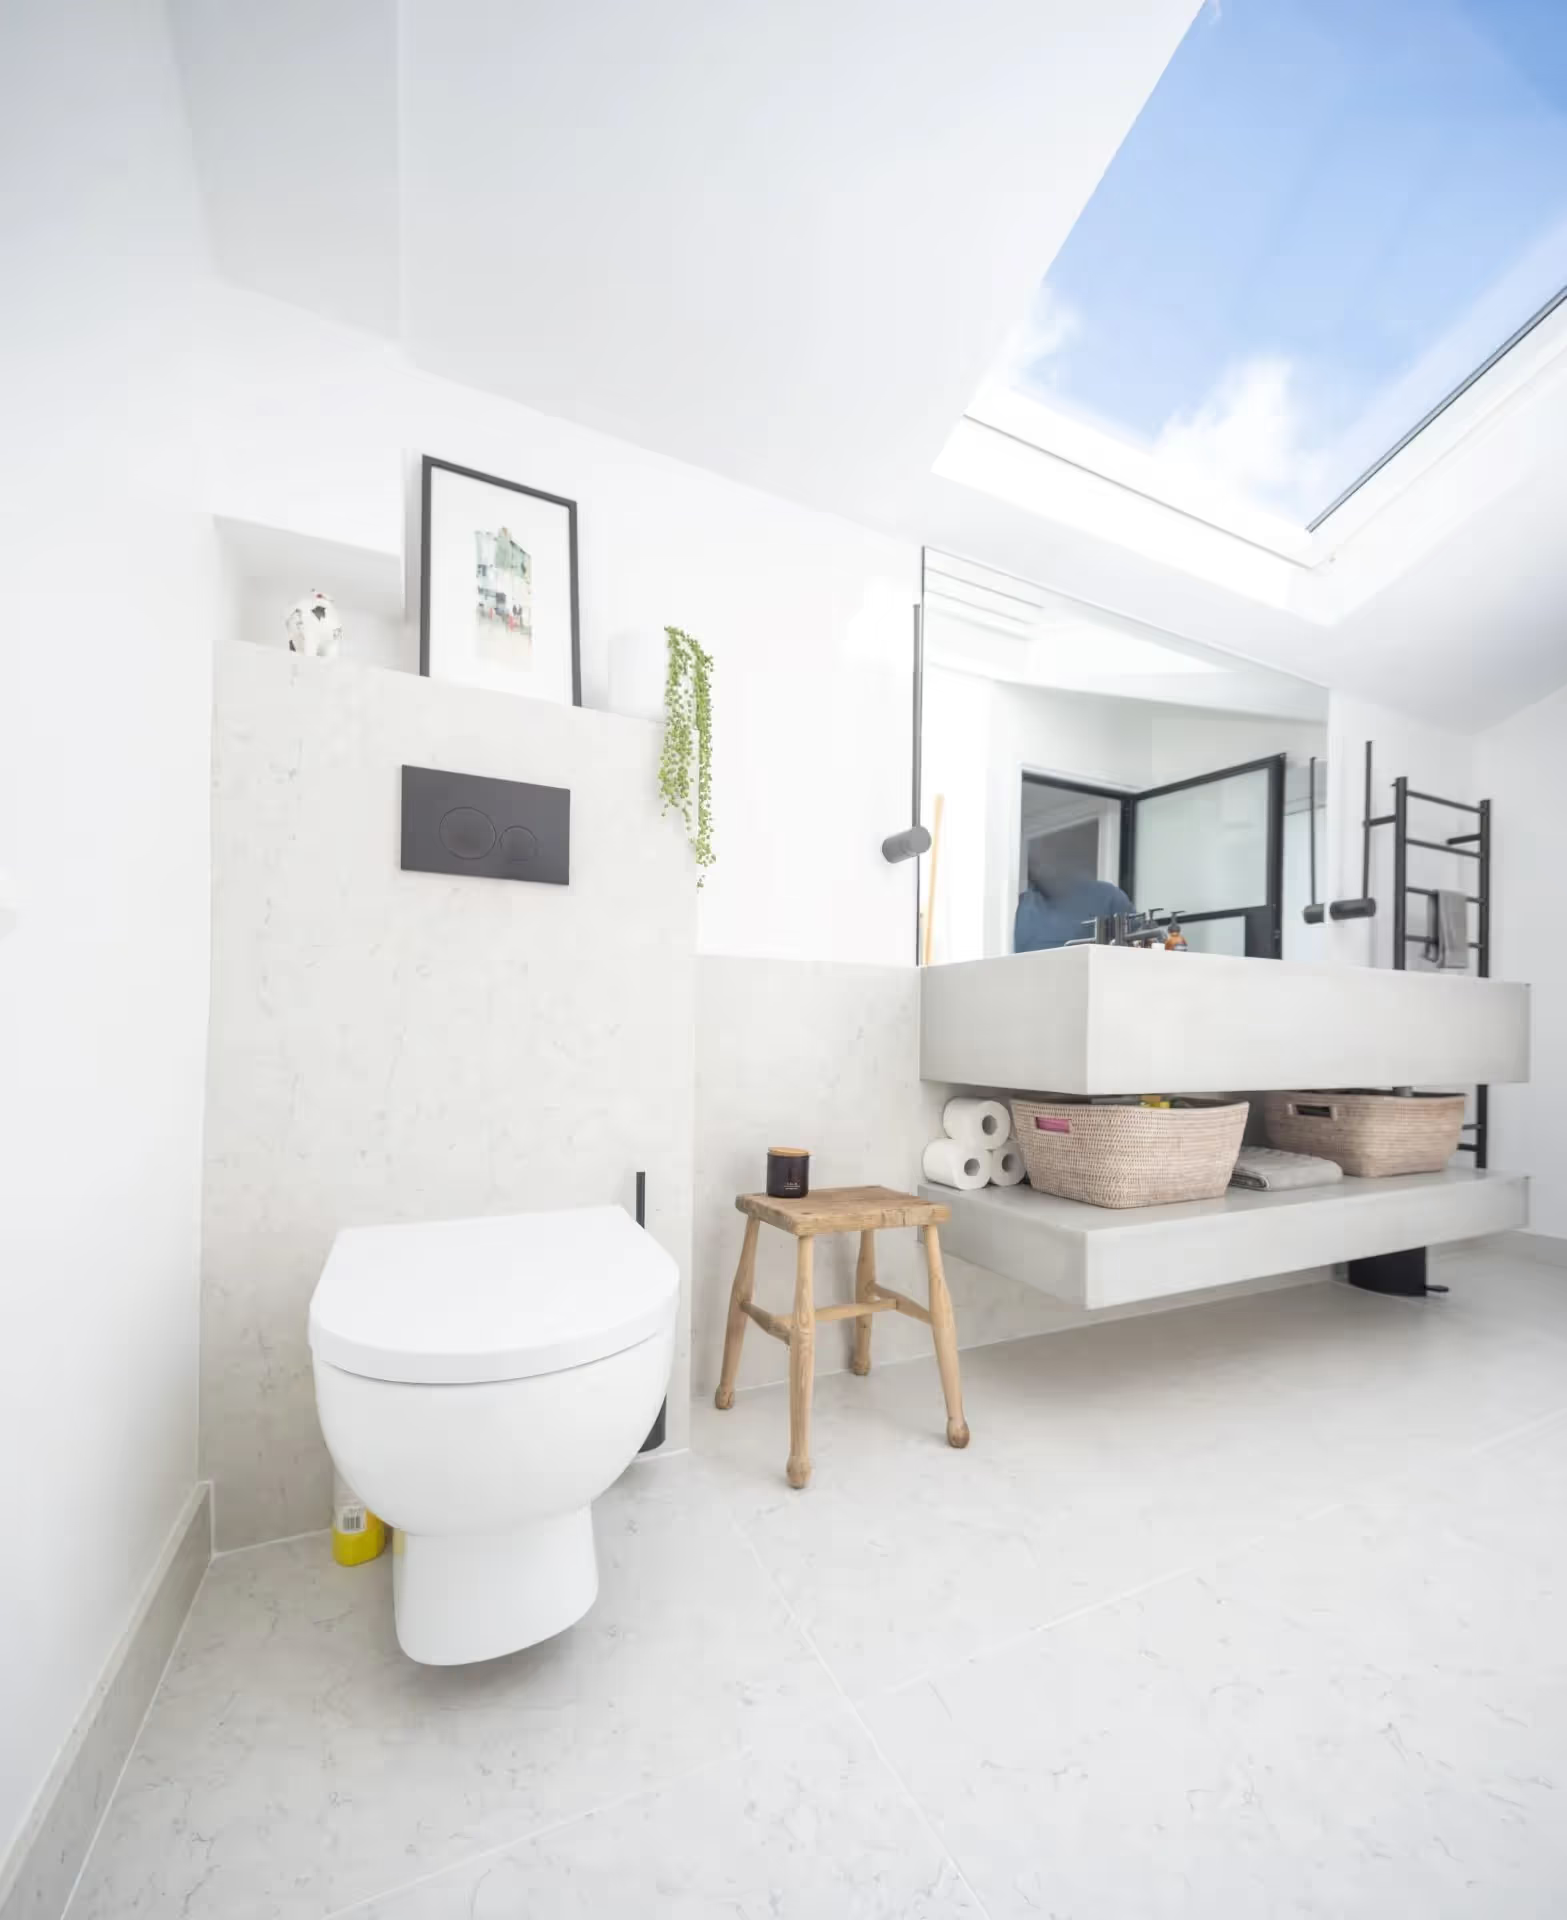
- Back-to-Wall (Wall Hung): This is a fantastic choice. The cistern and frame are hidden behind the wall or in a built-out vanity, leaving a very clean, modern look. The installation frames typically come in 820mm, 980mm, and 1180mm heights, giving you flexibility on how you build the wall out.
Small En-Suite
In an en-suite, you are taking a cloakroom and adding a shower into the mix. Standard layouts often feature a quadrant shower (curved at the front) to give a bit more moving room in a tight space.
However, a great alternative is to use a flush-to-floor shower tray with fold-back glass doors. Because the floor is flush, you effectively create a wet-room environment, even though technically the shower is still contained. When you aren't showering, the doors fold flat against the wall, giving you back all that floor space so the room doesn't feel like a cramped box when you're just using the sink.
Standard Family Bathroom
Here, the major question is whether you are keeping the bath. Once the soil stack determines the toilet, find the walls that can comfortably take a bath. It may be that the best wall to put the bath on is actually underneath the window; as long as it fits, that can work fine.
There are two things to consider here. First, frosted glass is highly recommended for the window because you will be standing up getting in and out of the bath. Secondly, it does mean that you will be standing in the bath to clean the window. If you are perfectly happy with both of those points, there's no reason why you can't do that.
The remaining footprint will dictate your shower and basin sizes. Showers and basins are a lot easier to find in special sizes, so that's why you should leave those till last. If all you are left with are some spaces where you would need to use bespoke sizes for the shower and the basin, that is more than possible. Finding bespoke-sized baths, although feasible, is a lot more expensive and trickier, and toilets pretty much are all of a very similar size.
Rectangular Bathroom
These long, narrow spaces can be tricky, especially if the door is located directly at one of the short ends. If you can move the door to the middle of the long wall, do it. It allows you to enter the room centrally—perhaps facing a stunning basin and mirror—with a large walk-in shower to one side and a toilet tucked away to the other.
If you can't move the door, you may have to think outside the box. I once tackled this exact problem with a narrow bathroom that had the door in the centre of the short wall and the window directly opposite. My solution was to build the bath in across the far wall (under the window) and create a large wet-zone shower directly in front of it. This allowed for a spacious basin near the door, with the wet zone neatly separated by glass doors at the back. You can actually see exactly how this layout turned out by checking out the example in our project portfolio.
Larger Bathroom
When you have a large footprint, the rules start to change a little bit. You don't have to push everything up against the walls if you don't want to. You could build a central dividing wall, placing a double vanity on one side and a walk-through shower on the other. Large spaces give you the freedom to incorporate freestanding baths in the centre of the room or build dedicated enclosures for saunas and steam rooms. It's only at this size where separate, dedicated zones truly become realistic.
The Final Layers: Ventilation, Tiling, and Decoration
One thing that is relevant to all the rooms we've just covered is extraction. Now, if you actually have an opening window in your bathroom, you are not strictly obliged to also have extraction. But generally speaking, it's a pretty good idea. There are a variety of ways of building extraction in, and a good approach is to work the main layout in first, leaving the exact visual placement of the extractor until the end so it fits around the bathroom layout and decoration.
The most common method is an inline ceiling vent, usually positioned directly over the shower. You have a neat vent in the ceiling leading to an inline motor in the attic, which then extracts the steam out through the eaves. These are relatively straightforward to fit upstairs and will remove a massive amount of steam. If you don't have ceiling access, you can go through the wall. This involves a device where the motor and vent are combined, requiring a core hole through the wall. These are a little bit more visible, so they need to be considered carefully in the design. Both types are usually wired to come on with the main light and feature an overrun facility or a humidity sensor, so for electrical connections, they require both a switched and a permanent feed to keep clearing the air after you've left the room.
One crucial thing to be aware of when fitting an extractor is heat loss. If you just fit an open vent with a standard external grill, you have effectively just drilled a hole straight through your bathroom wall. Through the UK winter, this will lead to the bathroom feeling a little bit on the cooler side because your heat has a direct route to escape.
The solution here is to use an extractor with a closing external vent; for a belt-and-braces approach, some extractor openings also close internally as well when the motor isn't running. This gives you the best of both worlds: when the room isn't in use, you aren't losing heat and the space can warm up, but the moment you turn the light on, the vents open to create that through-flow of air.
Once the extraction and layout are sorted, it comes down to the decoration. Bathrooms are quite unique compared to most fitted rooms because, generally speaking, the furniture is not the largest visual element in the space. In a kitchen, you might be using a lot of cabinetry, and that becomes the primary decoration of the room. In a bathroom, the furniture, although still significant to the overall aesthetic, isn't completely covering the walls. If you have a toilet, a basin, and a glass shower enclosure, you see right through that glass straight to the walls. Because the sanitaryware is not completely covering the walls, the aesthetic becomes equally about the walls and what you do with them. That added detail is where you can really make a bathroom your own.
When it comes to tile sizes, there is everything from tiny mosaics right up to huge sheet materials that will cover an entire wall, not to mention the thousands of different finishes. You also don't have to stick to just one tile. You could mix finishes, half-tile and paint the top half, use a feature wallpaper, or even go for Venetian plastering. Inside the shower enclosure itself, you could use standard tiling, or you could use large-format Silestone or Dekton cladding. Using these engineered stones means you still get a stunning finish but with incredibly minimal grout lines. You even have the option to match wall finishes with vanity units and shower trays; combine this with the many finishes available in brassware and accessories, and the options really are endless.
Even though we’ve talked a lot about the standardisation of bathroom products, a truly bespoke sanctuary is ultimately made in the chosen finishes and the lighting. Because it's such a unique, personal decision driven by your budget and taste, the best thing you can do is take your time looking through different finishes to find exactly what works for you.
Bath, Shower, or Both?
Historically, before high-pressure combi boilers became standard, homes relied on back boilers and gravity-fed hot water cylinders. These systems often lacked the water pressure required for a decent shower, making baths the most practical and economical option—especially when families shared the bathwater.
Today, lifestyle habits have changed massively, and modern heating systems mean showers are often the priority. Many people now remove their bath entirely in favour of a large, luxurious walk-in shower. This is also a highly practical choice for future-proofing, as climbing in and out of a bath becomes more difficult with age.
What about both in one footprint (Shower over the bath)? While this was quite popular 20 years ago and is still seen regularly in hotels, achieving a great experience with a shower over a bath is difficult. To shower comfortably, you need ample space to move around, which means a wider bath. But a wider bath takes an enormous amount of water to fill and cools down faster.
Getting a flexible glass screen to seal perfectly against a bath edge is challenging, and if the screen is sealed fixed in place, it could make the bath experience feel a little claustrophobic. You usually end up compromising on one of the experiences. From an aesthetic standpoint, separate units always tend to look and feel better so long as you have the space.
Can a shower go next to a window? It would personally not be my first choice, but it is definitely possible. I would first suggest the glass be heavily frosted for privacy. The main issue to consider next is water pooling on the windowsill. While there are a few ways to tackle this, my personal suggestion is to keep the solution as simple as possible.
I would advise against trying to block the water with a secondary piece of flush glass; I've seen this tried with varied success. The golden rule is that water will always find a way. Any areas that may end up leading to trapped water need to be avoided. My advice would be to instead ensure the windowsill is simply sloped back down into the shower so the water always has a clear path to drain away, minimising areas where water could get trapped and making the whole area much easier to maintain.
The Elements (and Manufacturers) That Make Up a Bathroom
Behind the Scenes:
- Plumbing fittings and pipes
- Framework and structure (back-to-wall toilet frames, basin frames with hidden waste fittings)
- Underfloor or in-wall heating
- Wet board
- Brassware rough fittings
- LED lighting
On Display:
- Toilet / Washlet toilet
- Vanity unit
- Vanity sink
- Mirror / Mirror cabinet
- Shower tray
- Shower enclosure
- Bath
- Brassware (basin tap, shower valve, shower heads, bath taps)
- Towel rail / Heating source
- Tiles
- Tile trims
- Accessories (toilet brush, soap holder, towel hook, etc.)
- LED lighting
Common Layout Mistakes to Avoid
If you are planning a bathroom layout, keep an eye on these common traps:
- Underestimating the Labour: The products might be cheap online, but the labour to fit a bathroom correctly, waterproof it, and tile it is expensive. Invest in products that justify the fitting cost.
- The plumbing can likely move: Don't let a soil pipe ruin your design. If moving the toilet revolutionises the layout, investigate it.
- The Standard Size Trap: Don't ruin a layout to fit an off-the-shelf shower tray or vanity unit. Custom sizes exist for a reason.
- Visible Pipework: Plan your layout so pipe boxing can be integrated gracefully, or pack out walls to hide waste pipes entirely.
- Embrace the Recess: If you are packing off a wall to hide pipes, use that depth to create backlit storage niches in the shower.
- Invest in the "Rough": Quality brassware relies on the valve mechanism buried inside the wall. To change the valve also means changing the rough, so invest wisely.
- Floor Structure: When planning budgets and levels, remember the difference between concrete floors (which require chasing out for pipes) and regular timber-joisted floors.
- Reduce Grout Lines: Grout discolours and attracts mould. There is the option to use custom-fabricated stone cladding for walls and trays to eliminate grout lines almost entirely.
- Mismatched Trims: If you stray from standard chrome, ensure your hinges, handles, brassware, and tile trims are accurately colour-matched.
- Master the Light: Plan a layered scheme separating bright "Task Lighting" from soft "Mood Lighting", integrated directly into cabinetry.
- Cure the Clutter: Visual noise kills relaxation. Ensure you have closed cabinets with intelligent internal organisers.
How to Plan Your Layout
Once you understand the different layout options available, the next step is figuring out exactly what works in your specific room. Unless you happen to have access to professional design software—and the background to use it—the quickest and easiest way to plan your layout doesn't require a computer at all. It starts at the kitchen table with a piece of paper, a tape measure, and a ruler.
Working to Scale
For this to work, you do need to work to scale, but if you don't have a scale ruler, don't worry. It's actually quite easy to do. One nice, easy option would be to simply say that one metre is equal to 10 centimetres. Now, if that doesn't happen to fit on the page you are working on, then you can simply use division to work out the best fit. So, for example, one metre might be equal to 5 centimetres or 2 centimetres—whatever works for the size of the room and size of page you have, to be able to draw your room onto the paper. Write down your scale, and then for every measurement, you just do the division maths to work it out.
Step 1 - Millimetre Precision First
First, you need to create a scaled bird's-eye view plan of your room. You want these measurements to be incredibly accurate, right down to the millimetre. Measure the main walls, but don't forget the vertical space—make a note of the exact height of the windowsill off the floor. Crucially, map out your existing infrastructure. Exactly where is the soil pipe? Is there any pipe boxing in the room, and if so, will it be required in your new layout, or can it be removed (i.e., are you moving the pipes)? Note any funny shapes, alcoves, or awkward angles. Get the best dimensions of everything you possibly can and draw your blank canvas to scale.
Step 2 - The Cut-Out Trick
Next, you need to create your components. You don't need to be Picasso here, but you need to draw basic, to-scale shapes for the items you want to include: the bath, the toilet, the basin unit, and the shower. Once drawn, cut these to-scale blocks out with a pair of scissors.
Step 3 - Play "Sanctuary Tetris"
If you are struggling to visualise the flow of the room, this is where the magic happens. Take your cut-out blocks and physically move them around on your floor plan. Play around with different configurations. While you might need a little bit of imagination to visualise what the final room will look like, physically moving these shapes breaks you out of the trap of thinking, "The toilet has to go there because that's where the old one was". Move the pieces until the flow of the room actually feels right for you.
Step 4 - Break the Rules
While you are moving your blocks around, you might find an incredible layout, only to realise that the space left for the shower or vanity unit doesn't match a standard, off-the-shelf tray size. Do not let restrictive, standard sizes ruin your ideal layout. If a standard shower tray doesn't fit your new paper plan, remember that a completely bespoke shower area can easily be built using wet board material, custom-fabricated Silestone, and custom-cut glass to fit the exact footprint you have created.
Ultimately, if you are struggling to visualise your layout, then design software or, dare I say it, AI could help you later in the process to generate some 3D images so you can see exactly how the light and finishes will look. If you do decide to use AI for a visual, you must base this first on real-world sizes. AI cannot scale sizes, so it may show you something that is not actually possible. But before any of that, to get the fundamental flow of your sanctuary right, some paper and a pair of scissors is the absolute best starting point.
The Installation Reality: Plumber vs. Bathroom Fitter
As a member of the general public, the natural assumption is to hire a plumber to fit a bathroom. However, to use an analogy: asking a heating engineer to fit a high-end bathroom is a bit like asking a baker to cook your Sunday roast. It may be outside their usual remit, so it's a gamble as to what the outcome will be. Does the plumber you know mostly install boilers and fix radiators? If so, they may not have the finesse required for high-end furniture.
Fitting a bathroom is actually less plumbing than you may think. It is mostly building/joinery-based, with plastering, tiling, electrical work, and precise furniture installation. A typical three-week, high-end bathroom installation usually includes, on average, only 2 to 3 days of actual plumbing.
If you are interviewing installers, here are the 6 questions you need to ask:
What is your approach to pipework?
Ask if they usually remove all the existing pipework and replace it with new, or just connect to what is already there? Do they use plastic, copper, or a mix of both? Do they secure their pipework? The Answer You Want: The correct answers are: removed and redone (don't rely on old hidden pipes), a mix of copper and plastic (although some plumbers still don't trust plastic pipes, plastic is great for achieving long runs with minimal or no joints), minimised or no buried joints, and pinned pipes to avoid "water hammer" (rattling) every time a tap is turned on.
What lies beneath?
Ask them about their prep work. Do they tile directly onto the old walls? Do they use plasterboard? The Risk: Plasterboard is not waterproof. In fact, it is like a sponge, absorbing water and then crumbling and collapsing. If water gets past a bit of sealant, there is nothing to stop it damaging your bathroom and potentially downstairs rooms or ceilings. A true pro will talk about stripping back, repairing floors, and most importantly, tanking (waterproofing). They should use wet boarding in all wet zones. If they don't mention waterproofing before tiling, it's unlikely that this is their standard approach.
Who is managing the timeline?
Ask if they do all the work themselves, have a dedicated team, or rely on different subcontractors for each section. If they use subs, who is organising the timeline? The Risk: This is where many installations meet disaster—simple timing. The tiler was booked for Wednesday, but the plumber ran over, and now the tiler can't get back to you for two weeks due to other commitments. This isn't usually anyone's fault; unknown elements happen. But with a disjointed team, it becomes a nightmare. Ensure one person is responsible for the entire schedule.
Who is fitting the furniture (and do they have experience)?
If you have purchased something outside the standard—whether it’s a high-end vanity unit or a frameless shower enclosure—the likelihood is that it has significant value. Ask them: "If my products break during installation, is it covered under your insurance?" The Risk: Usually, this is not covered by their insurance, and depending on the cost of your item, it may be too much for them to cover personally. Avoid this standoff by making sure they know exactly what they are getting themselves into. Explain the complexities of your furniture before they start to ensure they are confident (and covered) to fit it.
Can I see examples of your tiling?
Ask to look at some pictures of their tiling. Look to see if symmetry was considered; was the layout well planned to avoid small, awkward cuts? Are grout lines even and tiles flat?
"Can you provide recommendations?"
Are they happy to show you some recommendations that they have received online, let you speak with a past client, or better still, do you have a friend or acquaintance that has already used them?
Planning Your Bathroom With AJKB
As you can probably tell by all the information we've just covered, there are multiple ways of approaching and planning a bathroom. We do have our own approach to bathroom planning and also material preferences that we would like to share with you.
At Andrew James Kitchens, Bedrooms & Bathrooms (AJKBB), we believe that the bathroom is more than just a functional space; it's a personal retreat. Our approach is centred on creating bespoke sanctuaries that seamlessly blend individual style with lasting quality and innovative functionality.
Our design philosophy revolves around a deep understanding of our clients' needs and aspirations. We begin by exploring how you envision using your bathroom, considering factors such as relaxation, efficiency, and personal expression. This client-centric approach informs every design decision, ensuring that the final result is a space that truly enhances your daily life.
If you are ready to stop piecing together standard parts and want to design a space tailored entirely around your lifestyle, book a consultation with us at our Wakefield showroom or explore our video gallery to start planning your sanctuary today.
Are you inspired?
Your dream awaits — let’s start planning today.
Step into our inspiring showroom, book a free consultation and see how we can help your create a perfect interiors to transform your home.